Une cuisine encombrée peut transformer la préparation des repas en cauchemar. Si vous avez du mal avec un espace de rangement limité ou des coins difficiles, l'ajout d'un panier coulissant à votre cuisine change la donne. Ces solutions de stockage polyvalentes maximisent l'espace vertical, améliorer l'accessibilité, et garder les ustensiles, épices, ou des articles de garde-manger à portée de main. Dans ce guide, nous vous guiderons dans l'installation d'un panier coulissant de cuisine tout en donnant des conseils pour choisir le bon matériel, éviter les erreurs courantes, et optimisez le flux de travail de votre cuisine.

Pourquoi ajouter un panier coulissant à vos armoires de cuisine?
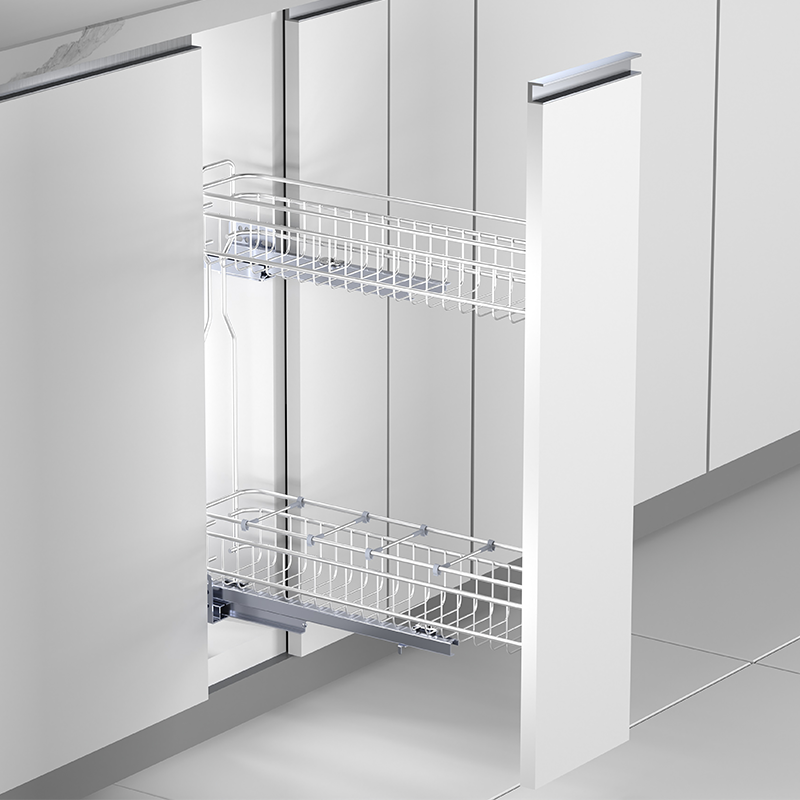
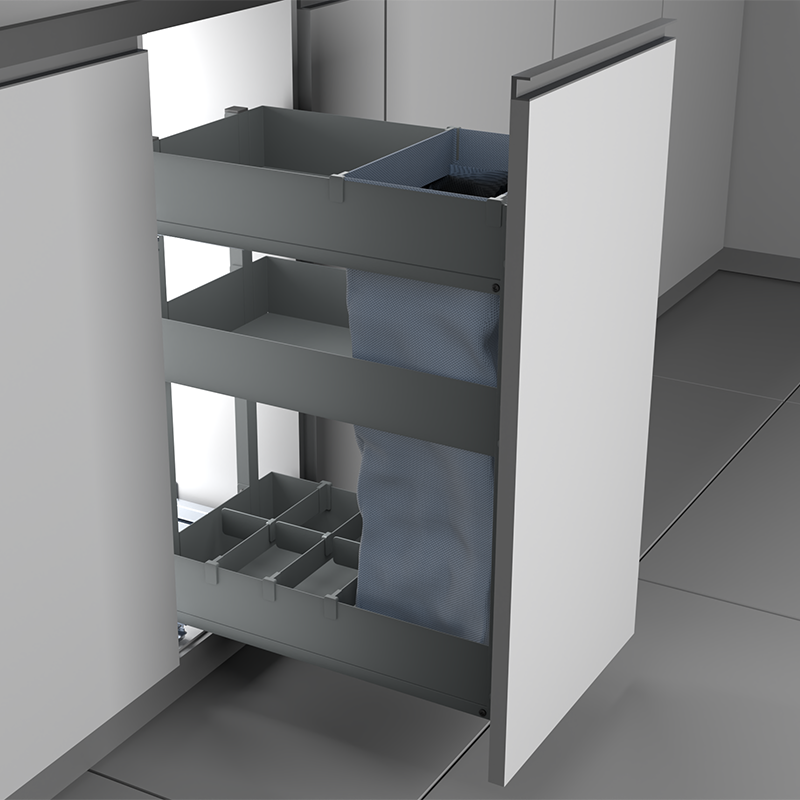
Paniers coulissants (également appelés paniers coulissants ou organisateurs de tiroirs coulissants) sont essentiels à l’organisation d’une cuisine moderne. Voici pourquoi ils valent l’investissement:
- Maximiser l'efficacité du stockage: Transformez des armoires profondes en espace fonctionnel avec des étagères à glissement fluide.
- Accès ergonomique: Plus besoin de s'accroupir ou de fouiller dans les piles : les objets glissent sans effort.
- Mises en page personnalisables: Les séparateurs réglables vous permettent d'organiser les pots, des casseroles, ou des collations.
- Construction durable: L'acier inoxydable de haute qualité ou le fil enduit assurent la longévité.

Étape 1: Choisissez le panier coulissant adapté à votre cuisine
Tous les paniers coulissants ne sont pas égaux. Considérez ces facteurs:
- Matériel: Optez pour paniers coulissants en acier inoxydable pour la durabilité ou fil enduit pour les articles légers.
- Taille: Mesurez la hauteur de votre armoire, largeur, et profondeur. Les tailles standard vont de 12" à 24" de large.
- Capacité de poids: Modèles robustes (20+ livres) pots de costume; les plus légers fonctionnent pour les épices ou les couverts.
- Mécanisme coulissant: Les glissières à fermeture douce à extension complète assurent un fonctionnement fluide et une utilisation silencieuse.

Étape 2: Préparez vos armoires pour l'installation
Avant de monter votre panier coulissant, assurez-vous que votre armoire est prête:
- Vider le placard: Supprimez tous les articles et étagères.
- Vérifier les obstructions: Cherchez des tuyaux, vis, ou des surfaces inégales.
- Renforcer les points faibles: Utilisez des panneaux de contreplaqué si les parois des armoires sont minces.
Étape 3: Installer les rails du panier coulissant
La plupart des paniers coulissants se fixent sur des rails latéraux. Voici comment:
- Marquer la position du rail: Utilisez un niveau pour marquer l'emplacement des rails (généralement 1 à 2 pouces sous le dessus de l'armoire).
- Percer des trous pilotes: Empêcher le fendillement du bois en pré-perçant des trous.
- Sécurisez les rails: Visser les rails en place, s'assurer qu'ils sont parallèles.
Étape 4: Fixez le panier et testez
Une fois les rails fixés:
- Enclenchez le panier sur les rails: La plupart des systèmes s'enclenchent.
- Testez le mouvement: Tirez complètement le panier : il doit glisser doucement sans vaciller..
- Ajuster si nécessaire: Serrez les vis ou repositionnez les rails pour l'alignement..

Utilisations créatives du panier coulissant dans votre cuisine
Ne limitez pas les paniers coulissants aux casseroles et poêles! Essayez ces idées:
- Supports à épices: Installez des paniers étroits près du poêle pour un accès facile aux assaisonnements.
- Poubelles ou tiroirs de recyclage: Cacher les bacs dans les armoires inférieures.
- Rangement vertical des casseroles: Utilisez des paniers hauts pour les plaques à pâtisserie et les planches à découper.
Conseils d'entretien pour un panier coulissant durable
- Nettoyer régulièrement: Essuyez les paniers métalliques avec un chiffon humide pour éviter l'accumulation de graisse.
- Lubrifier les diapositives: Appliquer spray silicone aux rails chaque année pour un fonctionnement silencieux.
- Évitez la surcharge: Respectez la limite de poids pour éviter l’affaissement.
Conclusion
L'ajout d'un panier coulissant à votre cuisine est une mise à niveau simple avec de grandes récompenses. En optimisant l'espace des armoires et en réduisant l'encombrement, vous créerez une cuisine à la fois fonctionnelle et agréable à utiliser. Que vous soyez un professionnel de la préparation de repas ou un cuisinier occasionnel, ce projet offre une valeur durable.


