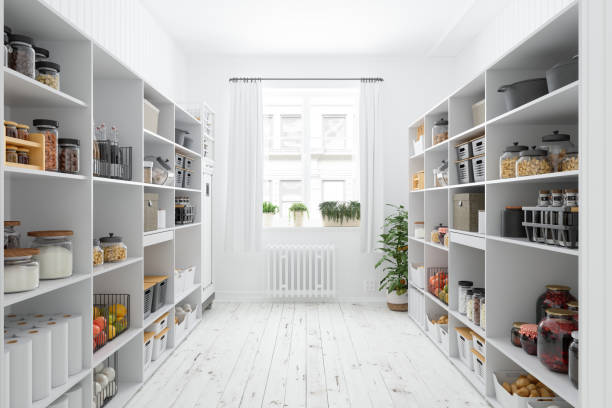
Tired of cluttered under-sink chaos and hard-to-reach pots? Building your own kitchen base cabinets with drawers offers unparalleled customization, significant cost savings, and the deep satisfaction of creating functional beauty with your own hands. This comprehensive, 1500+ word guide walks you through every step, from planning to finishing, empowering you to craft the perfect storage solution for your culinary space.
Why Build Custom Base Cabinets With Drawers?
- Perfect Fit: Tailor dimensions precisely to your kitchen layout and awkward spaces.
- Premium Quality: Select durable materials and robust hardware, exceeding typical stock cabinet longevity.
- Ultimate Organization: Design pull out drawers for kitchen cabinets at depths and heights that perfectly fit your cookware, pantry items, or cleaning supplies.
- Cost Savings: Save 30-50% or more compared to buying custom cabinets, even factoring in tools.
- Personal Satisfaction: Experience the pride of building truly functional kitchen elements.
Essential Materials
- Cabinet Box: 3/4″ Plywood (Birch, Maple, or Cabinet Grade Plywood recommended for durability and finish). Avoid particleboard for base kitchen cabinets with drawers bearing weight.
- Drawer Boxes: 1/2″ Plywood or Pre-finished Maple Drawer Sides. Consider solid wood for the front if not using separate drawer fronts.
- Drawer Fronts: 3/4″ Solid Wood (Maple, Oak, Cherry) or MDF for paint. Crucial for the look of your kitchen cabinets drawers.
- Hardware: Drawer Slides (Undermount slides are superior for kitchen cabinet pull out drawer operation and aesthetics), Screws (1 1/4″ & 2 1/2″ Pocket Hole Screws, 1″ Wood Screws), Wood Glue, Edge Banding (for plywood edges).
- Finishing: Sandpaper (120, 220 grit), Wood Filler, Primer, Paint or Stain, Polyurethane.
Step-by-Step Construction Guide
Phase 1: Planning & Cutting (Precision is Key!)
Design & Measure:
- Determine the exact location and size for each base kitchen cabinet with drawers. Standard base cabinet depth is 24″ (including countertop overhang), height is 34.5″ (for 36″ counter height), width varies (12″, 15″, 18″, 24″, 30″, 36″ common).
- Crucial: Account for toe kicks (usually 3-4″ high x 3″ deep recess at the bottom).
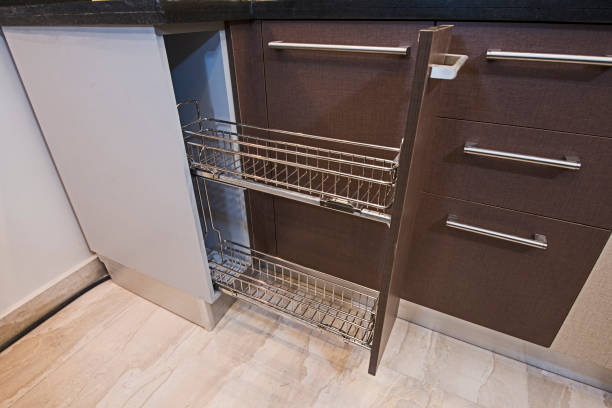
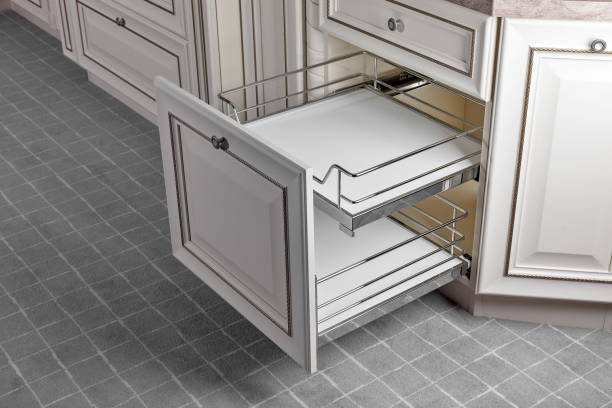
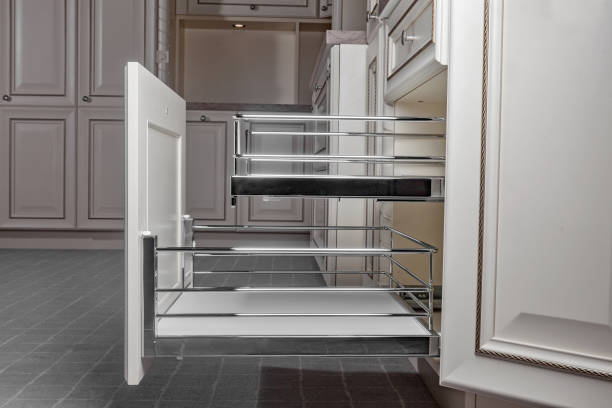
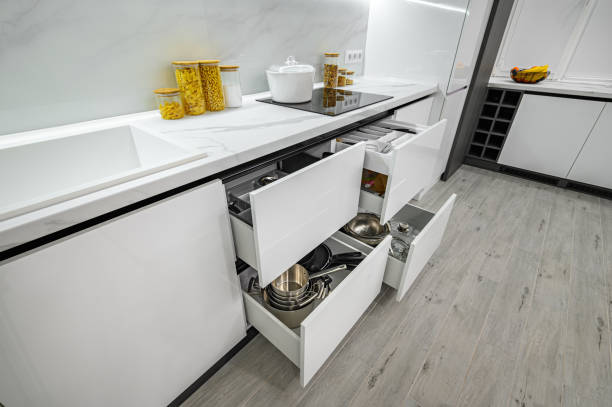
- Plan drawer sizes within the cabinet box. Consider full-extension pull out drawers for kitchen cabinets for maximum access. Standard heights: 4″-6″ (utensils), 8″-10″ (pots/pans), 12″+ (deep storage).
- Drawer Slide Choice: Select slides based on weight rating and type (side-mount or undermount). Undermount slides offer a cleaner look and smoother full-extension for your kitchen cabinet pull out drawer.
- Create detailed cut lists for every component: Sides, Top/Bottom, Back, Fixed Shelf (if any), Drawer Box Parts (Front, Back, Sides, Bottom), Drawer Fronts, Toe Kick.
Cutting the Cabinet Box Parts:
1. Using your cut list, meticulously cut the cabinet parts from 3/4″ plywood:
- Sides (2): Height = Total Cabinet Height – Toe Kick Height (e.g., 34.5″ – 4″ = 30.5″). Depth = Cabinet Depth (e.g., 24″).
- Top & Bottom (2): Width = Cabinet Width – (2 x Plywood Thickness). Depth = Cabinet Depth. *Example: For a 24″W cabinet: 24″ – (2 x 0.75″) = 22.5″W x 24″D.*
- Back (1): Width = Cabinet Width – (2 x Plywood Thickness). Height = Side Height. Example: 24″W cab: 22.5″W x 30.5″H.
- Fixed Shelf (Optional – adds rigidity): Same dimensions as Top/Bottom. Position it strategically below where the top drawer will run.
- Toe Kick Board (1): Length = Cabinet Width, Height = Toe Kick Height (e.g., 4″).
2. Label all pieces clearly (e.g., “Left Side,” “Bottom,” “Shelf”) to avoid confusion.
Phase 2: Assembling the Cabinet Carcass
1. Join Sides, Top, and Bottom:
- Lay one cabinet side panel flat. Apply wood glue to the edge where the bottom panel will attach.
- Clamp the bottom panel perpendicularly to the side panel.
- Use a Kreg jig to drill 2-3 pocket holes along the inside face of the bottom panel, facing the side panel. Drive 1 1/4″ pocket screws to secure. Repeat for the top panel.
- Attach the second side panel to the top and bottom panels using the same pocket hole method. You now have a basic rectangular frame.
- Check for square by measuring diagonals corner-to-corner. Adjust gently until diagonal measurements are equal. Secure with clamps.
2. Install the Back Panel:
- Place the cabinet frame on its face.
- Apply glue to the back edges of the frame.
- Position the back panel (cut 1/8″-1/4″ smaller than the opening for easier fit).
- Secure using 1″ wood screws driven every 6-8 inches around the perimeter into the sides, top, and bottom. This panel is crucial for squaring the entire cabinet.
3. Install the Fixed Shelf (If Used):
- Measure and mark the position for the shelf on the inside faces of both side panels (ensure level!).
- Apply glue to the shelf ends. Position the shelf.
- Drill pocket holes in the ends of the shelf facing the side panels OR use cleats/shelf pins. Drive screws to secure. This greatly strengthens the structure for supporting kitchen cabinet drawers.
4. Attach the Toe Kick:
- Turn the cabinet upside down.
- Position the toe kick board flush with the front and sides at the bottom.
- Secure it using 1 1/4″ pocket screws driven upwards through the top of the toe kick board into the bottom panel of the cabinet. Alternatively, attach it later during installation using brackets.
Phase 3: Building & Installing the Kitchen Cabinet Drawers
Cut Drawer Box Parts:
- Drawer Front & Back: Height = Drawer Opening Height – (Slide Clearance + Small Gap). Width = Drawer Opening Width – (2 x Slide Clearance + Small Gap). Refer to your specific slide instructions! Clearance is critical.
- Drawer Sides (2): Height = Same as Front/Back. Length = Drawer Depth (Cabinet Depth minus Thickness of Drawer Front minus ~1″). *Example: For 24″ deep cab: 24″ – 0.75″ – 1″ = ~22.25″.*
- Drawer Bottom: Width = Drawer Front Width. Depth = Drawer Side Length. *Cut from 1/4″ plywood or hardboard.*
Assemble Drawer Box:
1. Method 1 (Pocket Holes – Strong & Simple):
- Drill pocket holes along the inside bottom edge of the drawer front and back pieces.
- Apply glue to the ends of the drawer sides.
- Position a drawer side between the front and back pieces. Clamp.
- Drive 1 1/4″ pocket screws through the holes in the front/back into the ends of the drawer side. Repeat for the other side.
2. Method 2 (Dado/Rabbet – Traditional Strength):
- Cut a 1/4″ deep x 1/2″ wide dado groove along the inside bottom edge of all four drawer pieces (front, back, sides) to accept the drawer bottom.
- Cut rabbets on the ends of the front/back pieces to receive the drawer sides. Apply glue, assemble, and clamp. Use brad nails or pins for extra hold.
3. Insert Drawer Bottom: Slide the 1/4″ bottom into the grooves or rest it on a ledger. Secure with small brad nails or glue if no groove.
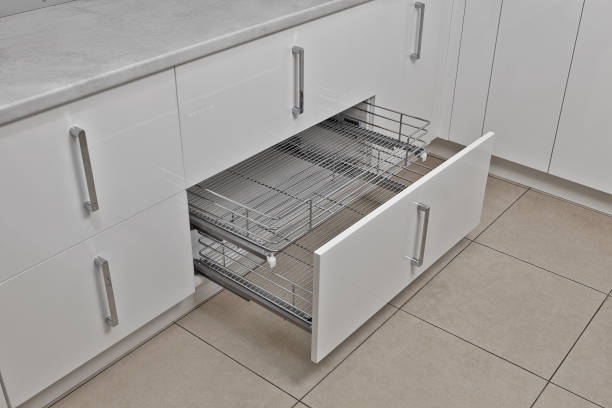
Install Drawer Slides:
Critical: Follow the exact instructions for your specific slides (side-mount or undermount). General steps:
- Mount Cabinet Members: Attach the cabinet part of the slides to the inside faces of the cabinet sides. Use spacers or jigs provided to ensure perfect alignment and level placement front-to-back and between slides. Measure twice! Proper slide installation defines the function of your kitchen cabinets drawers.
- Mount Drawer Members: Attach the drawer part of the slides to the outside faces of the drawer box sides, precisely aligned with the cabinet members.
Test Drawer Operation
Slide the drawer in and out multiple times. It should glide smoothly, extend fully (for full-extension slides), and close securely without binding. Adjust slide positions if necessary.
Phase 4: Drawer Fronts & Finishing Touches
1. Attach Drawer Fronts (The Face of Your Kitchen Cabinet Drawers):
- Place the drawer box into the cabinet opening. Insert shims (e.g., paint stir sticks) between the drawer box front and the cabinet face frame/opening to create even gaps (usually 1/8″ top/bottom/sides).
- Position the solid wood drawer front onto the drawer box, centered within the cabinet opening with consistent gaps.
- Clamp the drawer front securely to the drawer box through the cabinet opening.
- From Inside the Drawer Box: Drill pilot holes through the inside face of the drawer box front. Drive 1″ to 1 1/4″ screws through these holes into the back of the drawer front. Typically 2 screws near the top and 2 near the bottom. Avoid screws long enough to poke through the front!
- Remove clamps and test drawer operation with the front attached. Adjust if gaps aren’t even.
2. Apply Edge Banding: Cover all exposed plywood edges (especially visible cabinet sides and top edges) with iron-on wood veneer edge banding for a seamless, finished look. Trim excess carefully.
3. Sanding & Filling: Sand all surfaces smoothly, starting with 120-grit and finishing with 220-grit. Fill any screw holes, pocket holes, or imperfections with wood filler. Sand filler smooth once dry.
4. Finishing:
- Prep: Remove all dust thoroughly (tack cloth is ideal). Protect drawer slides with masking tape.
- Stain (Optional): Apply wood stain evenly with a brush or rag, following grain. Wipe off excess. Allow to dry completely per manufacturer.
- Topcoat: Apply 2-3 coats of primer if painting or a clear polyurethane (oil-based for durability, water-based for ease). Lightly sand (220 grit) between coats for optimal adhesion and smoothness. Allow full curing time.
Installation & Pro Tips for Your Base Kitchen Cabinets With Drawers
- Level & Secure Cabinets: Install cabinets by leveling and shimming them perfectly, then securely screwing them together through the face frames or sides and into wall studs. Connect adjacent cabinets.
- Adjust Drawers: Most slides have fine-tuning screws to adjust drawer front alignment vertically and horizontally after installation. Use them to perfect the gaps.
- Add Hardware: Install drawer pulls or knobs onto the drawer fronts. Use a template for consistent placement.
- Pro Tips:
- Maximize Storage: Design your deepest kitchen cabinet pull out drawer for heavy pots/pans. Consider specialized inserts.
- Soft-Close: Invest in soft-close drawer slides – a luxury touch preventing slamming.
- Full-Extension is Essential: Ensures access to items at the very back.
- Test Fit Slides: Assemble one drawer and slide completely before cutting all parts.
- Practice Makes Perfect: Build a single small cabinet/drawer first if new to woodworking.
- Label Everything: Especially when building multiple cabinets simultaneously.
Conclusion
Building your own kitchen base cabinets with drawers is an ambitious but incredibly rewarding project. By following these detailed steps, selecting quality materials and hardware (especially those smooth pull out drawers for kitchen cabinets), and taking your time with precision, you’ll create storage that’s not only highly functional but also a beautiful, long-lasting testament to your DIY skills.